pyvista.fit_plane_to_points#
- fit_plane_to_points(
- points: MatrixLike[float],
- return_meta: bool = False,
- resolution: int = 10,
- init_normal: VectorLike[float] | None = None,
Fit a plane to points using its
principal_axes().平面は,ポイントの範囲に合うように自動的にサイズと向きが調整されます.
バージョン 0.42.0 で変更: The generated plane is now sized and oriented to match the points.
バージョン 0.42.0 で変更: The center of the plane (returned if
return_meta=True) is now computed as the center of the generated plane mesh. In previous versions, the center of the input points was returned.バージョン 0.45.0 で変更: The internal method used for fitting the plane has changed. Previously, singular value decomposition (SVD) was used, but eigenvectors are now used instead. See warning below.
警告
The sign of the plane's normal vector prior to version 0.45 may differ from the latest version. This may impact methods which rely on the plane's direction. Use
init_normalto control the sign explicitly.- パラメータ:
- pointsarray_like[
float] 平面を通過させるための
[N x 3]個の点の列の大きさ.- return_metabool, default:
False もし
Trueならば,生成された平面の中心と法線も返します.- resolution
int, default: 10 Number of points on the plane mesh along its edges. Specify two numbers to set the resolution along the plane's long and short edge (respectively) or a single number to set both edges to have the same resolution.
Added in version 0.45.0.
- init_normal
VectorLike[float] |str,optional Flip the normal of the plane such that it best aligns with this vector. Can be a vector or string specifying the axis by name (e.g.
'x'or'-x', etc.).Added in version 0.45.0.
- pointsarray_like[
- 戻り値:
pyvista.PolyData平面メッシュです.
pyvista.pyvista_ndarrayreturn_meta=Trueの場合は平面の中心.pyvista.pyvista_ndarrayreturn_meta=Trueの場合は平面の法線.
参考
fit_line_to_pointsFit a line using the first principal axis of the points.
principal_axesCompute axes vectors which best fit a set of points.
例
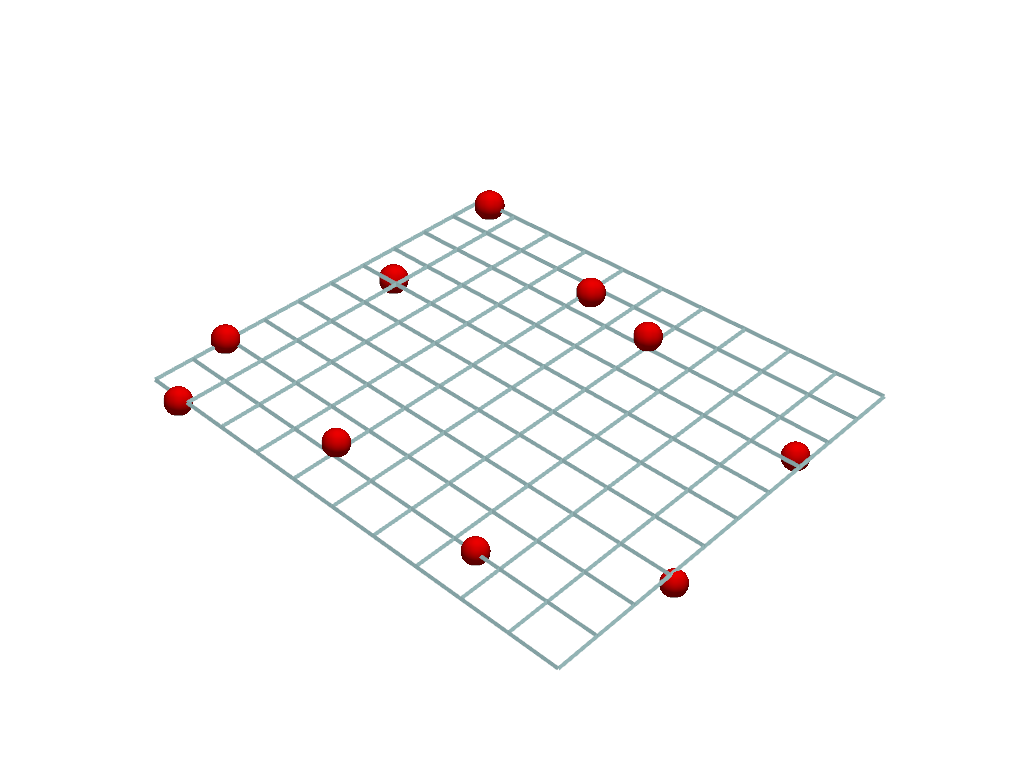
ランダムな点群に平面を当てはめます.
>>> import pyvista as pv
>>> import numpy as np
>>> from pyvista import examples
>>>
>>> rng = np.random.default_rng(seed=0)
>>> cloud = rng.random((10, 3))
>>> cloud[:, 2] *= 0.1
>>>
>>> plane = pv.fit_plane_to_points(cloud)
Plot the point cloud and fitted plane.
>>> pl = pv.Plotter()
>>> _ = pl.add_mesh(plane, style='wireframe', line_width=4)
>>> _ = pl.add_points(
...     cloud,
...     render_points_as_spheres=True,
...     color='r',
...     point_size=30,
... )
>>> pl.show()
Fit a plane to a mesh and return its metadata. Set the plane resolution to 1 so that the plane has no internal points or edges.
>>> mesh = examples.download_shark()
>>> plane, center, normal = pv.fit_plane_to_points(
...     mesh.points, return_meta=True, resolution=1
... )
Plot the mesh and fitted plane.
>>> pl = pv.Plotter()
>>> _ = pl.add_mesh(plane, show_edges=True, opacity=0.25)
>>> _ = pl.add_mesh(mesh, color='gray')
>>> pl.camera_position = [
...     (-117, 76, 235),
...     (1.69, -1.38, 0),
...     (0.189, 0.957, -0.22),
... ]
>>> pl.show()

Use the metadata with
pyvista.DataSetFilters.clip()to split the mesh into two.>>> first_half, second_half = mesh.clip( ... origin=center, normal=normal, return_clipped=True ... )
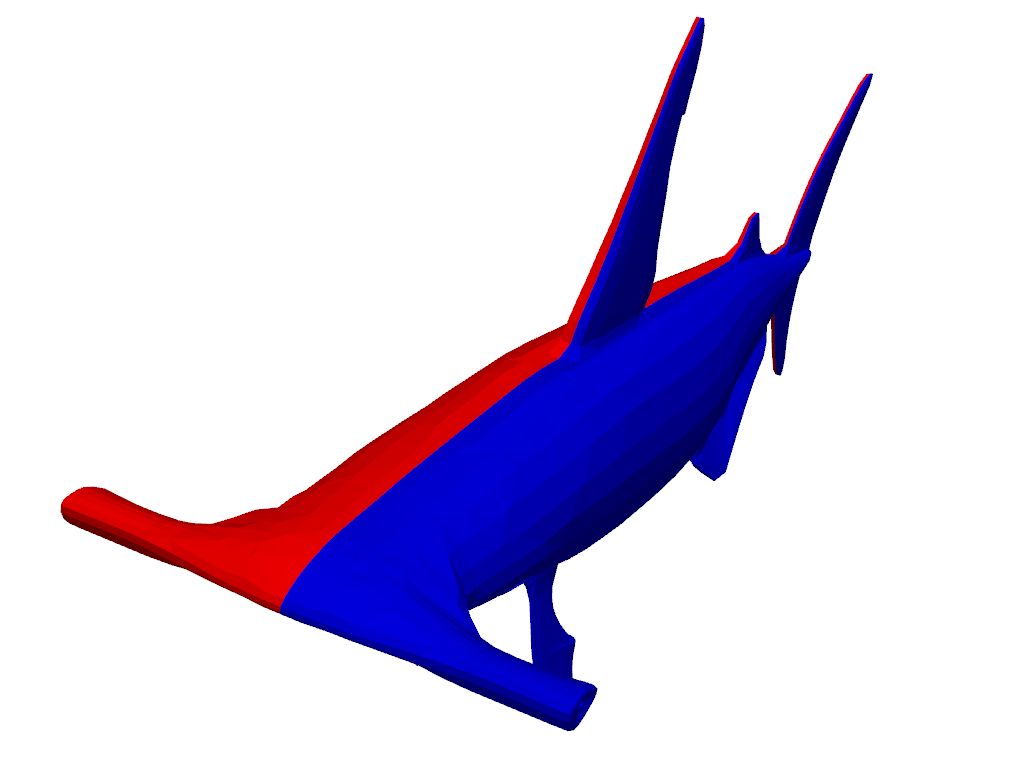
Plot the two halves of the clipped mesh.
>>> pl = pv.Plotter()
>>> _ = pl.add_mesh(first_half, color='red')
>>> _ = pl.add_mesh(second_half, color='blue')
>>> pl.camera_position = [
...     (-143, 43, 40),
...     (-8.7, -11, -14),
...     (0.25, 0.92, -0.29),
... ]
>>> pl.show()
Note that it is pointing in the positive z-direction.
>>> normal
pyvista_ndarray([5.2734075e-09, 6.7008443e-08, 1.0000000e+00],
                dtype=float32)
Use
init_normalto flip the sign and make it negative instead.>>> _, _, normal = pv.fit_plane_to_points( ... mesh.points, return_meta=True, init_normal='-z' ... ) >>> normal pyvista_ndarray([-5.2734155e-09, -6.7008422e-08, -1.0000000e+00], dtype=float32)