注釈
Go to the end をクリックすると完全なサンプルコードをダウンロードできます.
減衰#
減衰とは,光が媒質を通過するときに,光の強度が徐々に減衰する現象です.PyVistaでは,ポジションライトは減衰を示します.2次減衰モデルでは,減衰を記述するために,定数,線形,2次の3つのパラメータを使用します.これらのパラメータは,距離 I(r) の関数としてビーム強度の減少を記述し,広い意味で,1次,2次成分は点源からの距離による強度の I(r) = 1 , I(r) = 1/r , I(r) = 1/r^2 減衰に対応します.いずれの場合も,(ある種の)減衰値が大きいほど,(一定の距離の弱い光の)減衰が強くなります.
したがって,一定減衰パラメータは,ほぼ一定強度成分に対応します.線形及び2次減衰パラメータは,光源からの距離と共に減衰する強度成分に対応します.同じパラメータ値に対して,2次減衰は,線形減衰によって生成されるものよりも短い範囲のビームを生成します.
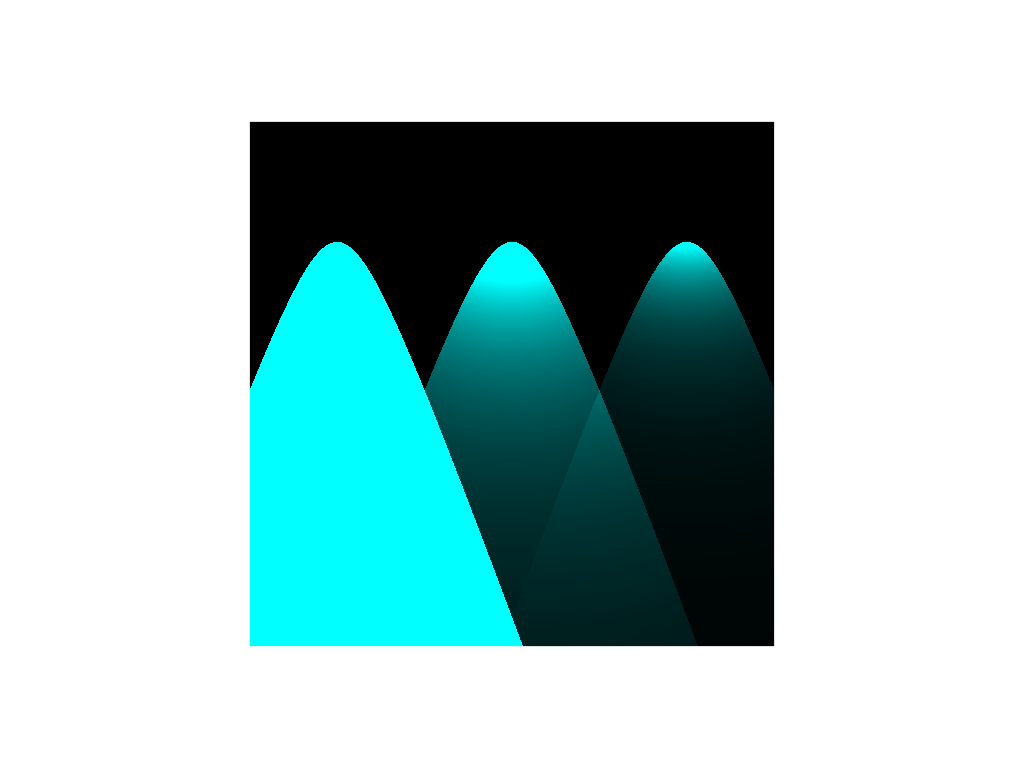
3つの異なる減衰プロファイルを持つ3つのスポットライト:
from __future__ import annotations

import pyvista as pv

plotter = pv.Plotter(lighting='none')
billboard = pv.Plane(direction=(1, 0, 0), i_size=6, j_size=6)
plotter.add_mesh(billboard, color='white')

all_attenuation_values = [(1, 0, 0), (0, 2, 0), (0, 0, 2)]
offsets = [-2, 0, 2]
for attenuation_values, offset in zip(all_attenuation_values, offsets):
    light = pv.Light(position=(0.1, offset, 2), focal_point=(0.1, offset, 1), color='cyan')
    light.positional = True
    light.cone_angle = 20
    light.intensity = 15
    light.attenuation_values = attenuation_values
    plotter.add_light(light)

plotter.view_yz()
plotter.show()
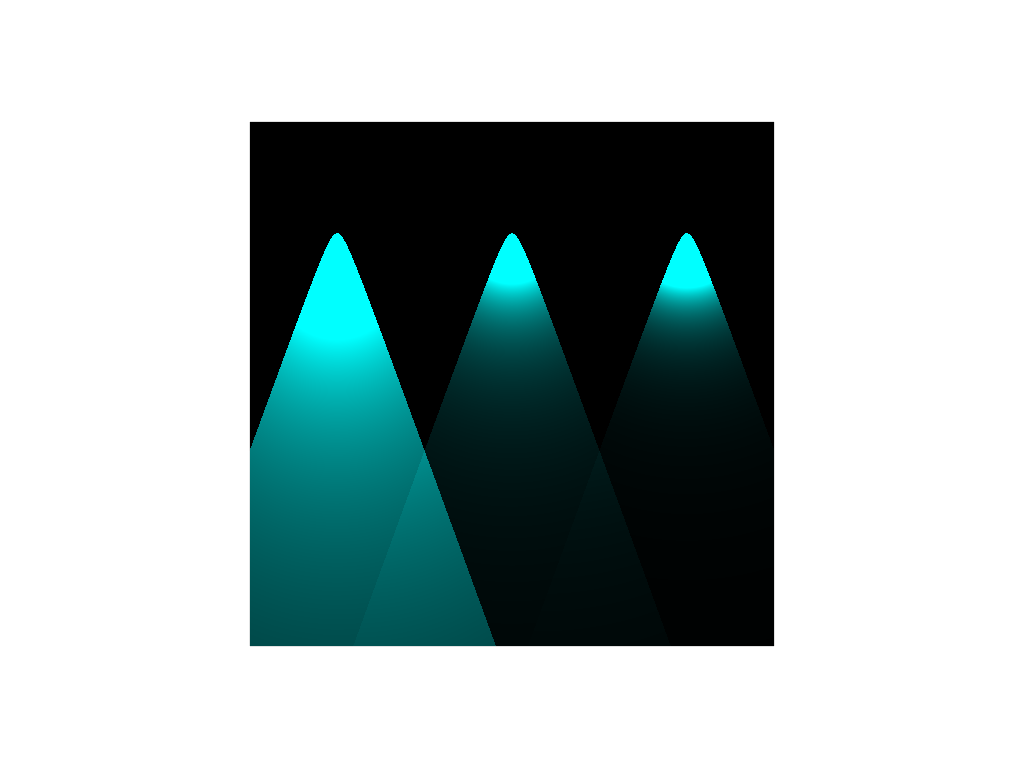
一目瞭然ではありませんが,2次減衰された右端のライトの範囲は,線形減衰された中央のライトの範囲よりも短いことがわかります.減衰が一定の一番左のライトでも徐々に輝度が失われているように見えますが,これはライトビームをそれぞれの軸に非常に近いところでスライスしたこと,つまりライトが非常に小さい角度でサーフェスに当たったことに関係しています.ライトが平面から離れるようにシーンを変更すると,次のように変更されます.
plotter = pv.Plotter(lighting='none')
billboard = pv.Plane(direction=(1, 0, 0), i_size=6, j_size=6)
plotter.add_mesh(billboard, color='white')

all_attenuation_values = [(1, 0, 0), (0, 2, 0), (0, 0, 2)]
offsets = [-2, 0, 2]
for attenuation_values, offset in zip(all_attenuation_values, offsets):
    light = pv.Light(position=(0.5, offset, 3), focal_point=(0.5, offset, 1), color='cyan')
    light.positional = True
    light.cone_angle = 20
    light.intensity = 15
    light.attenuation_values = attenuation_values
    plotter.add_light(light)

plotter.view_yz()
plotter.show()
3種類の減衰の関係がより明確になりました.
より実用的な比較のために,各ライトの軸に垂直な平面を見てみましょう(オブジェクト間のシャドウがデフォルトでは処理されないという事実を利用する):
plotter = pv.Plotter(lighting='none')

# loop over three lights with three kinds of attenuation
all_attenuation_values = [(2, 0, 0), (0, 2, 0), (0, 0, 2)]
light_offsets = [-6, 0, 6]
for attenuation_values, light_x in zip(all_attenuation_values, light_offsets):
    # loop over three perpendicular planes for each light
    for plane_y in [2, 5, 10]:
        screen = pv.Plane(center=(light_x, plane_y, 0), direction=(0, 1, 0), i_size=5, j_size=5)
        plotter.add_mesh(screen, color='white')

    light = pv.Light(position=(light_x, 0, 0), focal_point=(light_x, 1, 0), color='cyan')
    light.positional = True
    light.cone_angle = 15
    light.intensity = 5
    light.attenuation_values = attenuation_values
    light.show_actor()
    plotter.add_light(light)

plotter.view_vector((1, -2, 2))
plotter.show()

Total running time of the script: (0 minutes 0.704 seconds)