注釈
Go to the end をクリックすると完全なサンプルコードをダウンロードできます.
ビーム形状#
既定のディレクショナルライトは非常に離れたポイントソースで,ジオメトリのカスタマイズオプションはライトの位置と焦点によって定義されるビーム方向の選択だけです.ただし,ポジションライトには,より多くのビームカスタマイズオプションがあります.
2つの半球を考えてみましょう:
from __future__ import annotations

import pyvista as pv

plotter = pv.Plotter()

hemi = pv.Sphere().clip()
hemi.translate((-1, 0, 0), inplace=True)
plotter.add_mesh(hemi, color='cyan', smooth_shading=True)

hemi = hemi.rotate_z(180, inplace=False)
plotter.add_mesh(hemi, color='cyan', smooth_shading=True)

plotter.show()
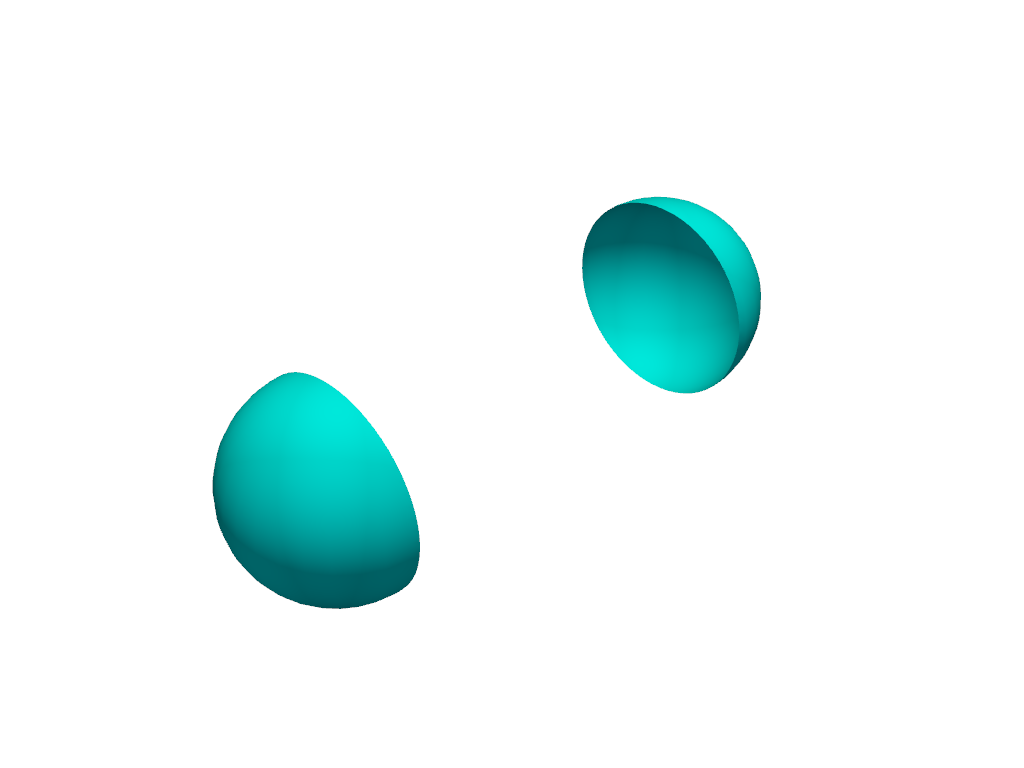
デフォルトのライティングでは,半球の形をはっきりと表現できます.
半球の間に配置され,半球の中心に沿って方向付けられたディレクショナルライトを照らします.
plotter = pv.Plotter(lighting='none')

hemi = pv.Sphere().clip()
hemi.translate((-1, 0, 0), inplace=True)
plotter.add_mesh(hemi, color='cyan', smooth_shading=True)

hemi = hemi.rotate_z(180, inplace=False)
plotter.add_mesh(hemi, color='cyan', smooth_shading=True)

light = pv.Light(position=(0, 0, 0), focal_point=(-1, 0, 0))
plotter.add_light(light)

plotter.show()
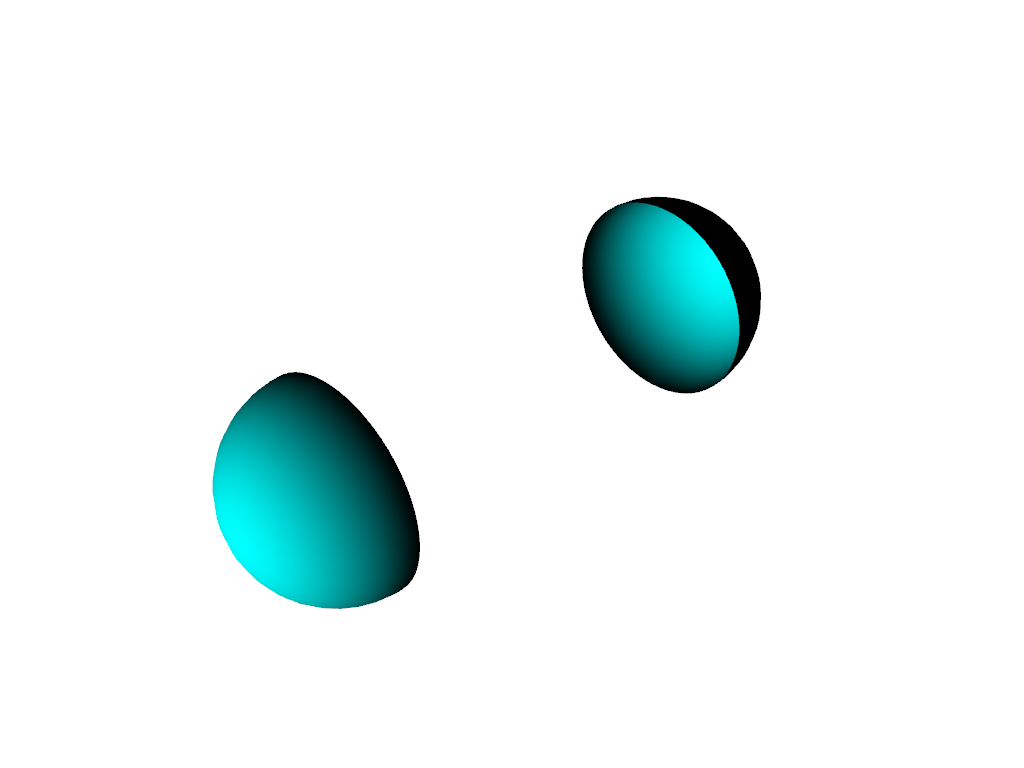
両半球のサーフェスは,ライトに面した側で照らされます.これは,光の公称位置から焦点に向かう無限遠に位置する点光源と一致します.
ここで,ライトをポジショナルライトに変更します(スポットライトではありません):
plotter = pv.Plotter(lighting='none')

hemi = pv.Sphere().clip()
hemi.translate((-1, 0, 0), inplace=True)
plotter.add_mesh(hemi, color='cyan', smooth_shading=True)

hemi = hemi.rotate_z(180, inplace=False)
plotter.add_mesh(hemi, color='cyan', smooth_shading=True)

light = pv.Light(position=(0, 0, 0), focal_point=(-1, 0, 0))
light.positional = True
light.cone_angle = 90
plotter.add_light(light)

plotter.show()
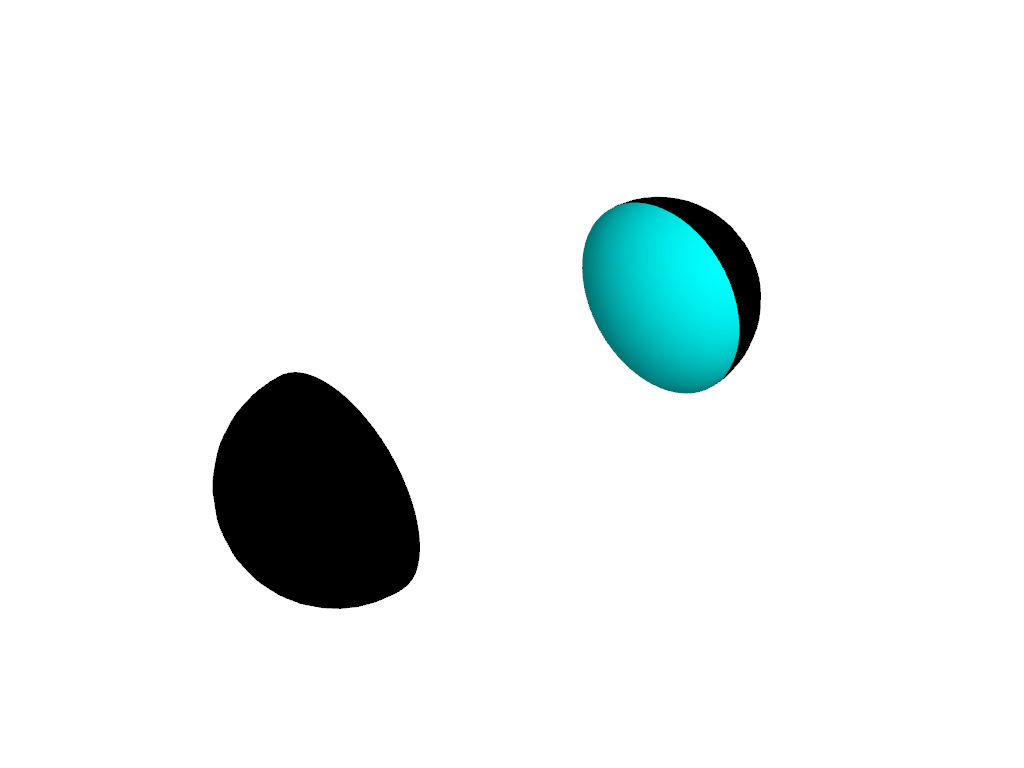
これで両半球の内側のサーフェスが照らされました.コーンアングルが90度(以上)の位置ライトは,ライトの公称位置にあるポイントソースとして機能します.減衰も表示できます. 減衰 の例を参照してください.
スポットライト(コーンアングルが90度未満のポジショナルライト)に切り替えると, pyvista.Light.exponent プロパティを使用したビーム成形が有効になります.このために半球を並べて,それぞれの中心にライトを配置しましょう.1つのスポットライトで,1つは単に位置を示すライトです.
plotter = pv.Plotter(lighting='none')

hemi = pv.Sphere().clip()
plotter.add_mesh(hemi, color='cyan', smooth_shading=True)

offset = 1.5
hemi = hemi.translate((0, offset, 0), inplace=False)
plotter.add_mesh(hemi, color='cyan', smooth_shading=True)

# non-spot positional light in the center of the first hemisphere
light = pv.Light(position=(0, 0, 0), focal_point=(-1, 0, 0))
light.positional = True
light.cone_angle = 90
# add attenuation to reduce cross-talk between the lights
light.attenuation_values = (0, 0, 2)
plotter.add_light(light)

# spotlight in the center of the second hemisphere
light = pv.Light(position=(0, offset, 0), focal_point=(-1, offset, 0))
light.positional = True
light.cone_angle = 89.9
# add attenuation to reduce cross-talk between the lights
light.attenuation_values = (0, 0, 2)
plotter.add_light(light)

plotter.show()
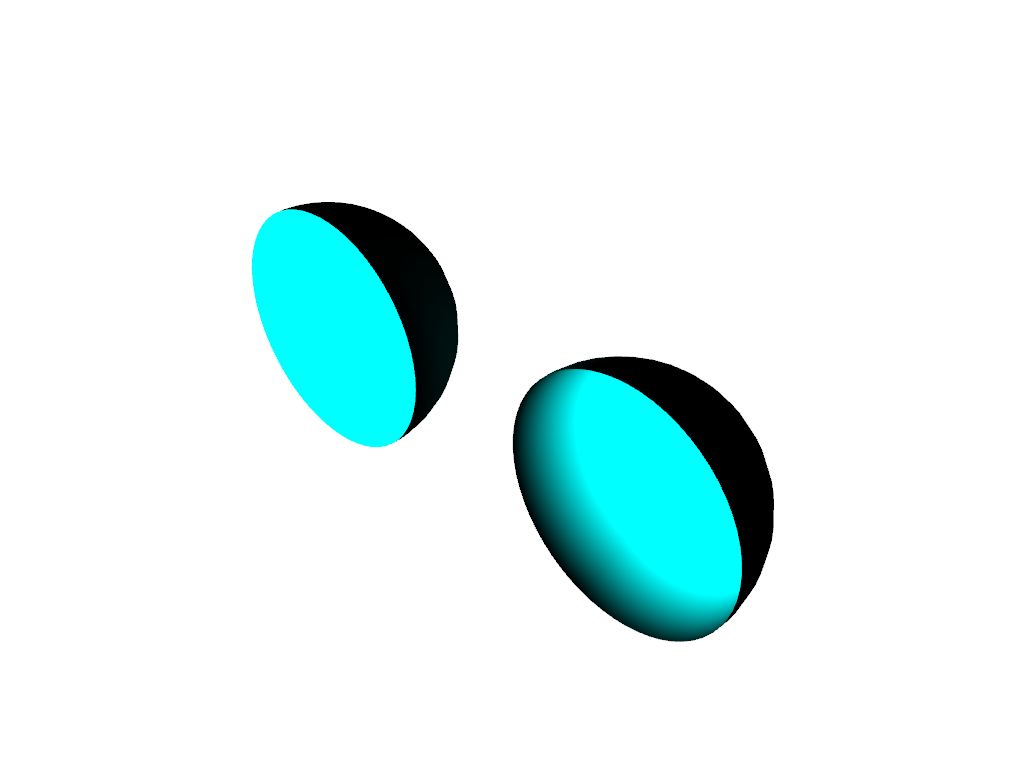
2つのライトのコーンアングルの違いはほんのわずかですが,スポットライトで有効にしたビーム成形エフェクトによって,結果に著しい違いが生じます.
スポットライトができたら,その pyvista.Light.exponent を変更して,ビームシェイプをよりシャープにしたり,より広くしたりすることができます.シャープさが異なる3つのスポットライト:
plotter = pv.Plotter(lighting='none')
hemi_template = pv.Sphere().clip()

centers = [(0, 0, 0), (0, 1.5, 0), (0, 1.5 * 0.5, 1.5 * 3**0.5 / 2)]
exponents = [1, 0.3, 5]

for center, exponent in zip(centers, exponents):
    hemi = hemi_template.copy()
    hemi.translate(center, inplace=True)
    plotter.add_mesh(hemi, color='cyan', smooth_shading=True)

    # spotlight in the center of the hemisphere, shining into it
    focal_point = center[0] - 1, center[1], center[2]
    light = pv.Light(position=center, focal_point=focal_point)
    light.positional = True
    light.cone_angle = 89.9
    light.exponent = exponent
    # add attenuation to reduce cross-talk between the lights
    light.attenuation_values = (0, 0, 2)
    plotter.add_light(light)

plotter.show()
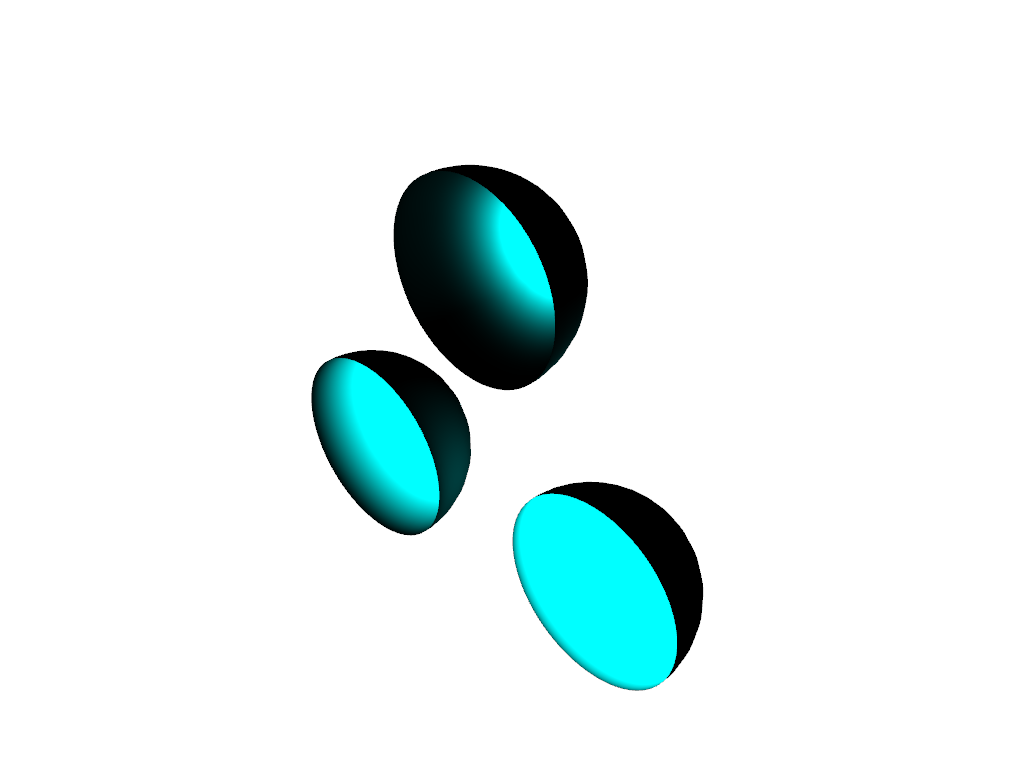
指数0.3のスポットライトは実質的に均一で,指数5のスポットライトはライトの軸に沿って目に見えるようにフォーカスされています.
Total running time of the script: (0 minutes 1.333 seconds)