注釈
Go to the end をクリックすると完全なサンプルコードをダウンロードできます.
リーダーによるデータの読み込み#
データファイルの読み取りをより細かく制御するには,クラスベースのリーダーを使用します.このクラスは,ファイルからのデータセットの読み込みをより細かく制御することができます. サポートされているファイルタイプのリストは, pyvista.get_reader() を参照してください.
from tempfile import NamedTemporaryFile

import numpy as np

import pyvista
from pyvista import examples
.vtp 形式のXML PolyDataファイルが作成されます. このファイルは,今回の例では一時ファイルに保存されます.
temp_file = NamedTemporaryFile('w', suffix='.vtp')
temp_file.name
'/tmp/tmpmzwvd7wy.vtp'
pyvista.Sphere には,すでに Normals という点データが含まれています. さらに, height のポイントデータと id のセルデータを追加します.
mesh = pyvista.Sphere()
mesh['height'] = mesh.points[:, 1]
mesh['id'] = np.arange(mesh.n_cells)
mesh.save(temp_file.name)
pyvista.read() 関数は,ファイル内のすべてのデータを読み込みます.これは,ファイルからデータを読み取るための,迅速で簡単なワンライナーを提供します.
new_mesh = pyvista.read(temp_file.name)
print(f'All arrays: {mesh.array_names}')
All arrays: ['height', 'Normals', 'id']
pyvista.get_reader() を使用することで,データファイルの読み込みをより細かく制御することができます. .vtp` ファイルの読み込みには, pyvista.XMLPolyDataReader を使用します.
reader = pyvista.get_reader(temp_file.name)
reader
# Alternative method: reader = pyvista.XMLPolyDataReader(temp_file.name)
XMLPolyDataReader('/tmp/tmpmzwvd7wy.vtp')
このクラスを含め,いくつかのリーダークラスは,すべてのデータを読み込む前にデータファイルを検査する機能を提供しています.例えば,点配列やセル配列の数や名前にアクセスすることができます.
print(f'Number of point arrays: {reader.number_point_arrays}')
print(f'Available point data:   {reader.point_array_names}')
print(f'Number of cell arrays:  {reader.number_cell_arrays}')
print(f'Available cell data:    {reader.cell_array_names}')
Number of point arrays: 2
Available point data:   ['Normals', 'height']
Number of cell arrays:  1
Available cell data:    ['id']
特定の配列,あるいはすべての配列を選択的に無効あるいは有効にすることで,読み取るデータを選択することができます. ここでは,すべてのセル配列と Normals 点の配列を無効にして, height 点の配列だけを残しています. データは最終的に height 点の配列のみを持つ pyvista オブジェクトに読み込まれます.
reader.disable_all_cell_arrays()
reader.disable_point_array('Normals')
print(f'Point array status: {reader.all_point_arrays_status}')
print(f'Cell array status:  {reader.all_cell_arrays_status}')
reader_mesh = reader.read()
print(f'Read arrays:        {reader_mesh.array_names}')
Point array status: {'Normals': False, 'height': True}
Cell array status:  {'id': False}
Read arrays:        ['height']
必要に応じて,リーダーオブジェクトを再利用して,異なる変数を選択することができます.
reader.enable_all_cell_arrays()
reader_mesh_2 = reader.read()
print(f'New read arrays: {reader_mesh_2.array_names}')
New read arrays: ['height', 'id']
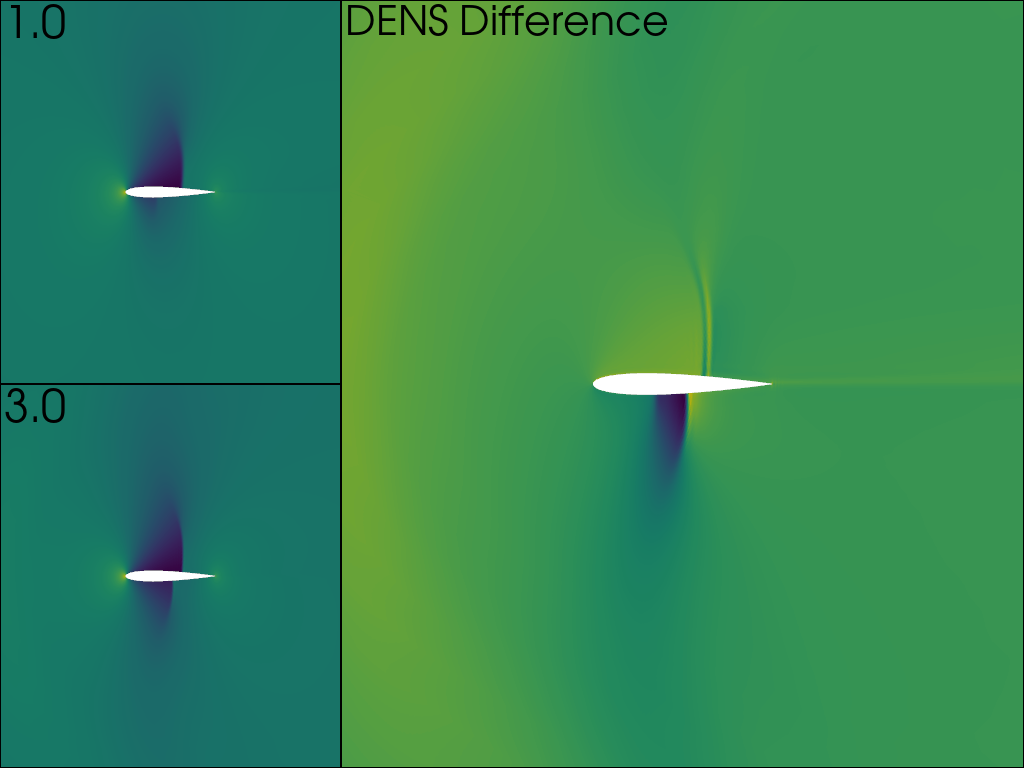
一部のリーダーでは,異なるタイムポイントやイテレーションの設定が可能です.いずれの場合も,タイムポイント機能を使って設定します.NACAデータセットには,密度を持つ2つのそのようなポイントがあります. このデータセットはEnSight形式で, pyvista.EnSightReader クラスを使用しています.
filename = examples.download_naca(load=False)
reader = pyvista.get_reader(filename)
time_values = reader.time_values
print(reader)
print(f'Available time points: {time_values}')
print(f'Available point arrays: {reader.point_array_names}')
EnSightReader('/home/runner/.cache/pyvista_3/EnSight/naca.bin.case')
Available time points: [1.0, 3.0]
Available point arrays: ['DENS']
まず両方のタイムポイントが読み込まれ,次に密度の差が計算され,2番目のメッシュに保存されます.pyvista.EnSightReader の read メソッドは, pyvista.MultiBlock インスタンスを取得します.このデータセットでは,3つのブロックがあり,新しいスカラーを各ブロックに適用する必要があります.
reader.set_active_time_value(time_values[0])
mesh_0 = reader.read()
reader.set_active_time_value(time_values[1])
mesh_1 = reader.read()

for block_0, block_1 in zip(mesh_0, mesh_1):
    block_1['DENS_DIFF'] = block_1['DENS'] - block_0['DENS']
左側の列には両時点での DENS の値が,右側の列にはその差がプロットされています.
plotter = pyvista.Plotter(shape='2|1')

plotter.subplot(0)
plotter.add_mesh(mesh_0, scalars='DENS', show_scalar_bar=False)
plotter.add_text(f'{time_values[0]}')

plotter.subplot(1)
plotter.add_mesh(mesh_1, scalars='DENS', show_scalar_bar=False)
plotter.add_text(f'{time_values[1]}')

# pyvista currently cannot plot the same mesh twice with different scalars
plotter.subplot(2)
plotter.add_mesh(mesh_1.copy(), scalars='DENS_DIFF', show_scalar_bar=False)
plotter.add_text('DENS Difference')

plotter.link_views()
plotter.camera_position = ((0.5, 0, 8), (0.5, 0, 0), (0, 1, 0))

plotter.show()
タイムポイントやイタレーションを読み込んで,ムービーを作ることもできます. GIFムービーの作成 と似ていますが,ここではParaViewデータ形式のファイルを使って,ファイルセットを読み込みます.このファイルフォーマットとリーダーは, pyvista.MultiBlock メッシュも取得します.
PVDReader('/home/runner/.cache/pyvista_3/PVD/wavy.zip.unzip/wavy.pvd')
各時点で,高さによって色付けされたメッシュをプロットします.左上に反復値を表示します
plotter = pyvista.Plotter(notebook=False, off_screen=True)
# Open a gif
plotter.open_gif('wave_pvd.gif')

for time_value in reader.time_values:
    reader.set_active_time_value(time_value)
    mesh = reader.read()[0]  # This dataset only has 1 block
    plotter.add_mesh(mesh, scalars='z', show_scalar_bar=False, lighting=False)
    plotter.add_text(f'Time: {time_value:.0f}', color='black')
    plotter.write_frame()
    plotter.clear()

plotter.close()
Total running time of the script: (0 minutes 3.958 seconds)