注釈
Go to the end をクリックすると完全なサンプルコードをダウンロードできます.
デプスイメージをレンダーする#
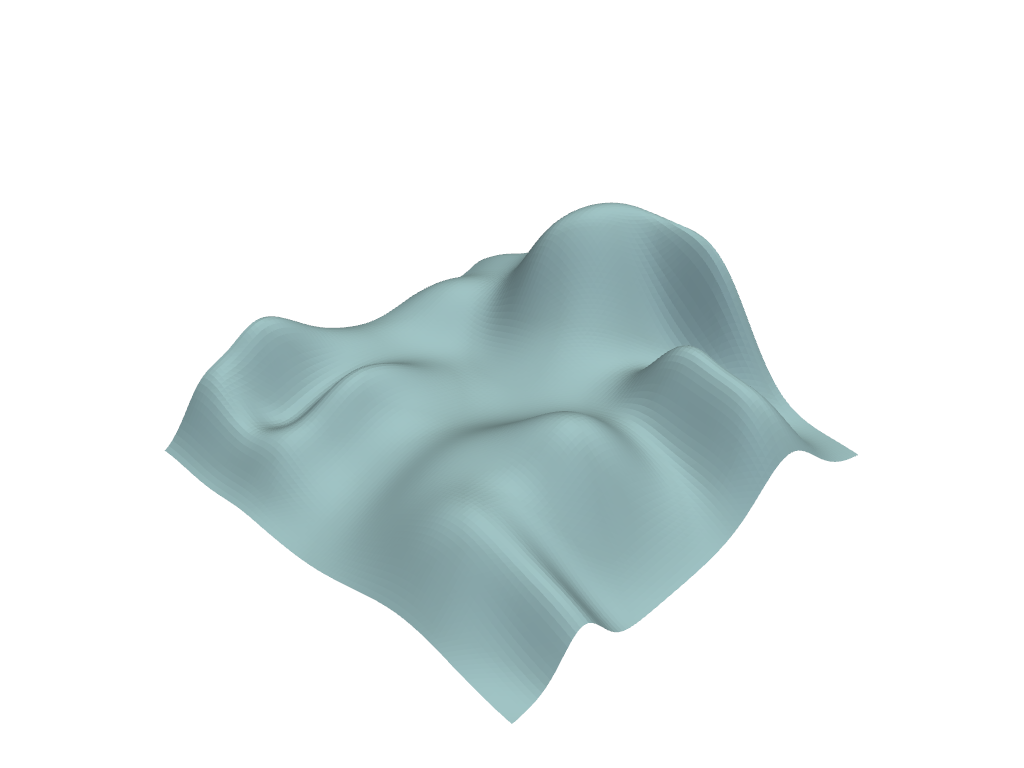
"丘"メッシュの例を見ながら,カメラから見た深度イメージをプロットします.
from __future__ import annotations

import matplotlib.pyplot as plt

import pyvista as pv
from pyvista import examples

# Load an interesting example of geometry
mesh = examples.load_random_hills()

# Establish geometry within a pv.Plotter()
p = pv.Plotter()
p.add_mesh(mesh, color=True)
p.show()
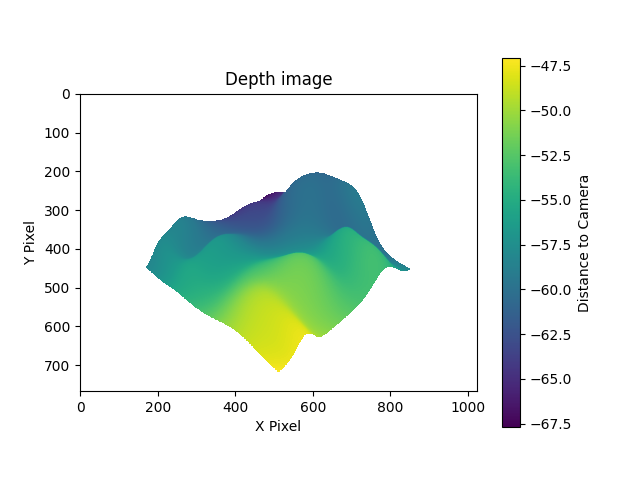
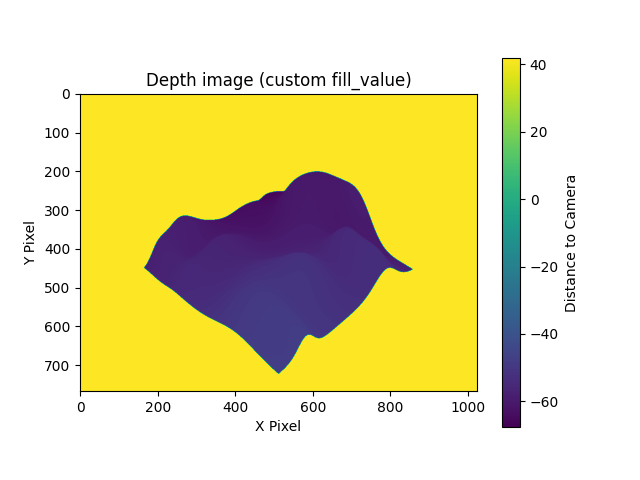
カスタム塗り潰し値を使用した場合と使用しない場合の画像深度の記録
zval = p.get_image_depth()
zval_filled_by_42s = p.get_image_depth(fill_value=42.0)
画像深度の可視化
plt.figure()
plt.imshow(zval)
plt.colorbar(label='Distance to Camera')
plt.title('Depth image')
plt.xlabel('X Pixel')
plt.ylabel('Y Pixel')
plt.show()
plt.figure()
plt.imshow(zval_filled_by_42s)
plt.title('Depth image (custom fill_value)')
plt.colorbar(label='Distance to Camera')
plt.xlabel('X Pixel')
plt.ylabel('Y Pixel')
plt.show()
Total running time of the script: (0 minutes 0.642 seconds)