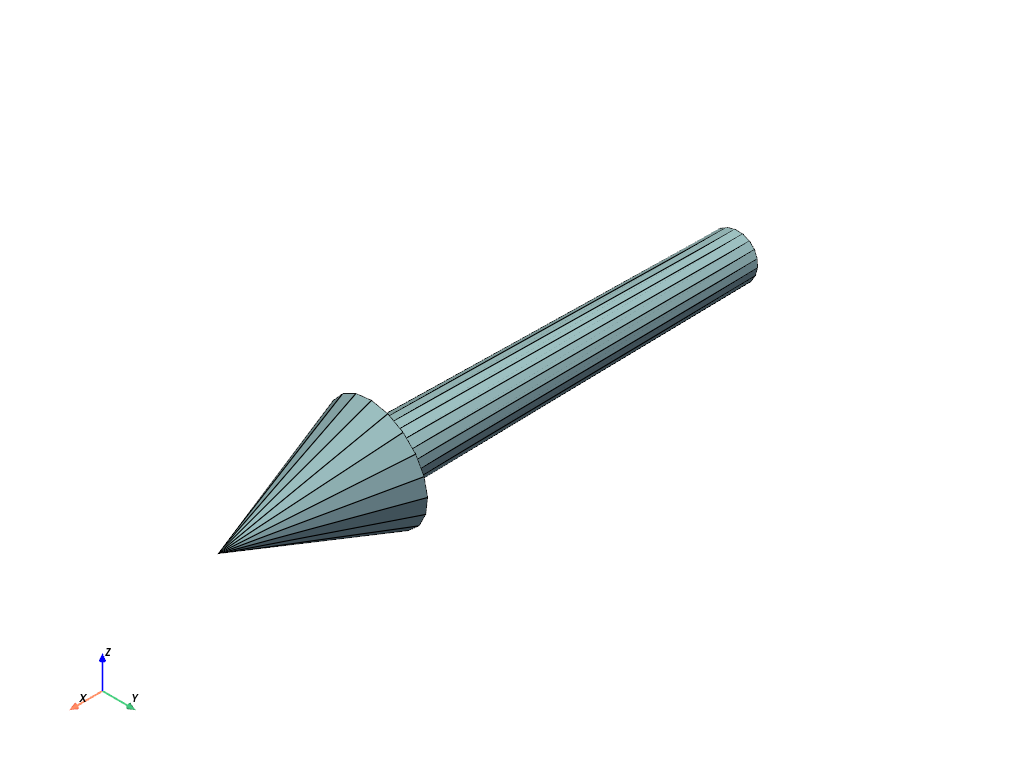
pyvista.Arrow#
- Arrow(
- start: VectorLike[float] = (0.0, 0.0, 0.0),
- direction: VectorLike[float] = (1.0, 0.0, 0.0),
- tip_length: float = 0.25,
- tip_radius: float = 0.1,
- tip_resolution: int = 20,
- shaft_radius: float = 0.05,
- shaft_resolution: int = 20,
- scale: float | Literal['auto'] | None = 1.0,
矢印を作成します.
- パラメータ:
- startsequence[
float], default: (0.0, 0.0, 0.0) [x, y, z]の開始位置.- directionsequence[
float], default: (1.0, 0.0, 0.0) [x, y, z]で矢印が指す方向.- tip_length
float, default: 0.25 先端の長さ.
- tip_radius
float, default: 0.1 先端の半径.
- tip_resolution
int, default: 20 先端の周囲の面の数.
- shaft_radius
float, default: 0.05 軸の半径.
- shaft_resolution
int, default: 20 軸の周囲の面の数.
- scale
float|str,optional オブジェクト全体のスケール係数,デフォルトは1のスケールです.
'auto'は方向配列の長さに合わせてスケールされます.
- startsequence[
- 戻り値:
pyvista.PolyData矢印のメッシュ.
例
デフォルトの矢印をプロットします.
>>> import pyvista as pv
>>> mesh = pv.Arrow()
>>> mesh.plot(show_edges=True)