pyvista.create_axes_marker#
- create_axes_marker(
- label_color=None,
- x_color=None,
- y_color=None,
- z_color=None,
- xlabel='X',
- ylabel='Y',
- zlabel='Z',
- labels_off: bool = False,
- line_width=2,
- cone_radius=0.4,
- shaft_length=0.8,
- tip_length=0.2,
- ambient=0.5,
- label_size=(0.25, 0.1),
軸となるアクターを作成します.
- パラメータ:
- label_color
ColorLike,optional ラベルテキストの色.
- x_color
ColorLike,optional Color of the x-axis text.
- y_color
ColorLike,optional Color of the y-axis text.
- z_color
ColorLike,optional Color of the z-axis text.
- xlabel
str, default: "X" Text used for the x-axis.
- ylabel
str, default: "Y" Text used for the y-axis.
- zlabel
str, default: "Z" Text used for the z-axis.
- labels_offbool, default:
False 軸のテキストラベルを有効または無効にします.
- line_width
float, default: 2 マーカーラインの幅.
- cone_radius
float, default: 0.4 軸の矢印の先端の半径を指定します.
- shaft_length
float, default: 0.8 軸のアローシャフトの長さです.
- tip_length
float, default: 0.2 先端の長さ.
- ambient
float, default: 0.5 軸の矢印の周囲を指定します.値は0から1の間でなければなりません.
- label_sizesequence[
float], default: (0.25, 0.1) 軸のラベルアクターの幅と高さ.値は 0 から 1 の間でなければなりません.例えば
(0.2, 0.1)のようになります.
- label_color
- 戻り値:
vtk.vtkAxesActor軸アクター.
例
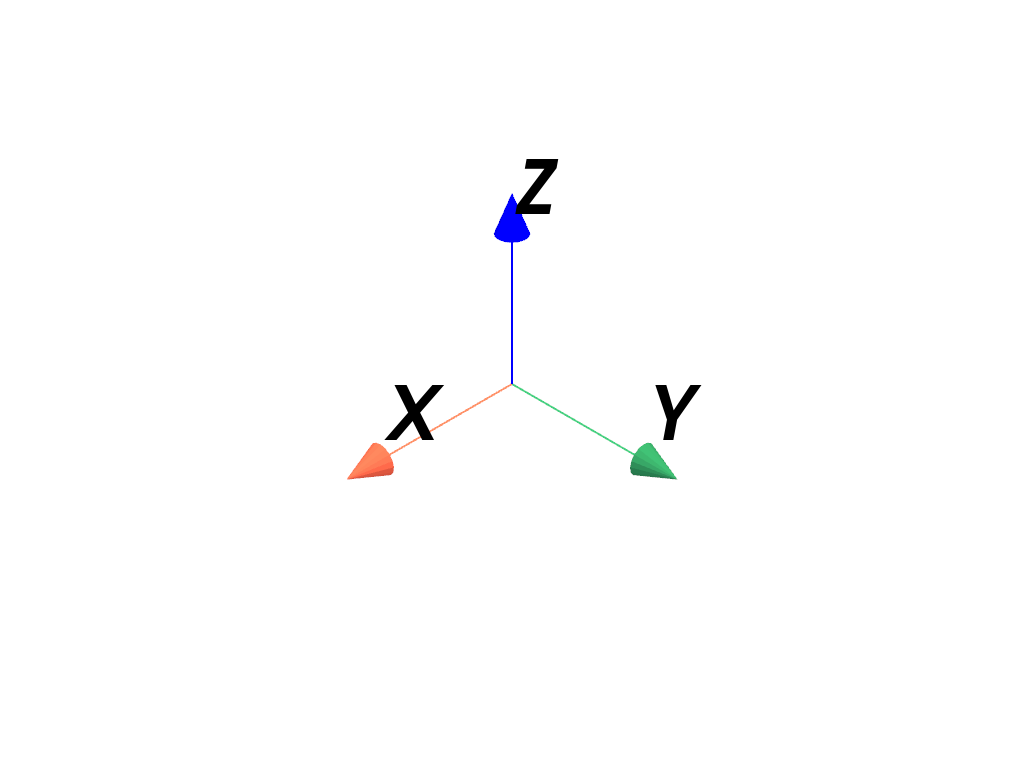
デフォルトの軸マーカを作成します.
>>> import pyvista as pv
>>> marker = pv.create_axes_marker()
>>> pl = pv.Plotter()
>>> _ = pl.add_actor(marker)
>>> pl.show()
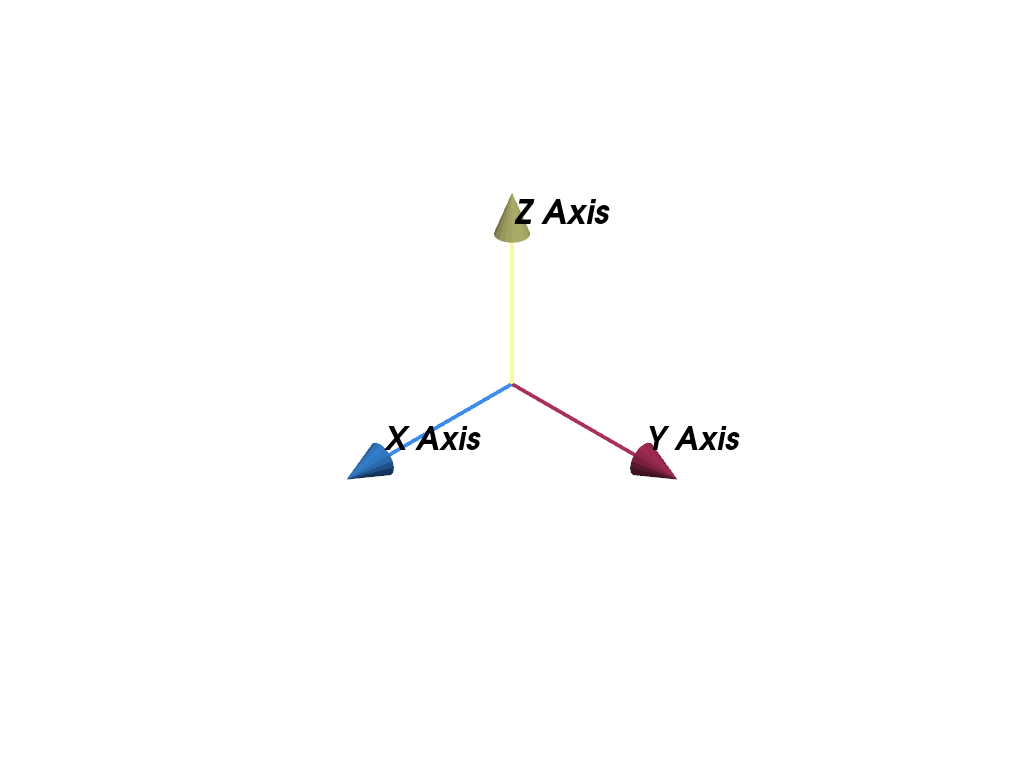
原点に軸マーカーを作成し,カスタムカラーと軸ラベルを設定します.
>>> import pyvista as pv
>>> marker = pv.create_axes_marker(
...     line_width=4,
...     ambient=0.0,
...     x_color='#378df0',
...     y_color='#ab2e5d',
...     z_color='#f7fb9a',
...     xlabel='X Axis',
...     ylabel='Y Axis',
...     zlabel='Z Axis',
...     label_size=(0.1, 0.1),
... )
>>> pl = pv.Plotter()
>>> _ = pl.add_actor(marker)
>>> pl.show()