注釈
Go to the end をクリックすると完全なサンプルコードをダウンロードできます.
メッシュの要素をピックする#
この例では, enable_element_picking() を使って,メッシュ上の異なる要素をピックする方法を示します.
メッシュのさまざまな要素は次のとおりです:
Mesh: メッシュ全体をピックします(
enable_mesh_picking()と同じ.)Cell: メッシュのセルをピックします(
enable_cell_picking()と同じ.)Face: メッシュのセルの1つの面をピックします
Edge: メッシュのセルの1つの端をピックします
Point: メッシュの1点をピックします
これらの型は pyvista.plotting.opts.ElementType に含まれています.
import pyvista as pv
from pyvista.plotting.opts import ElementType
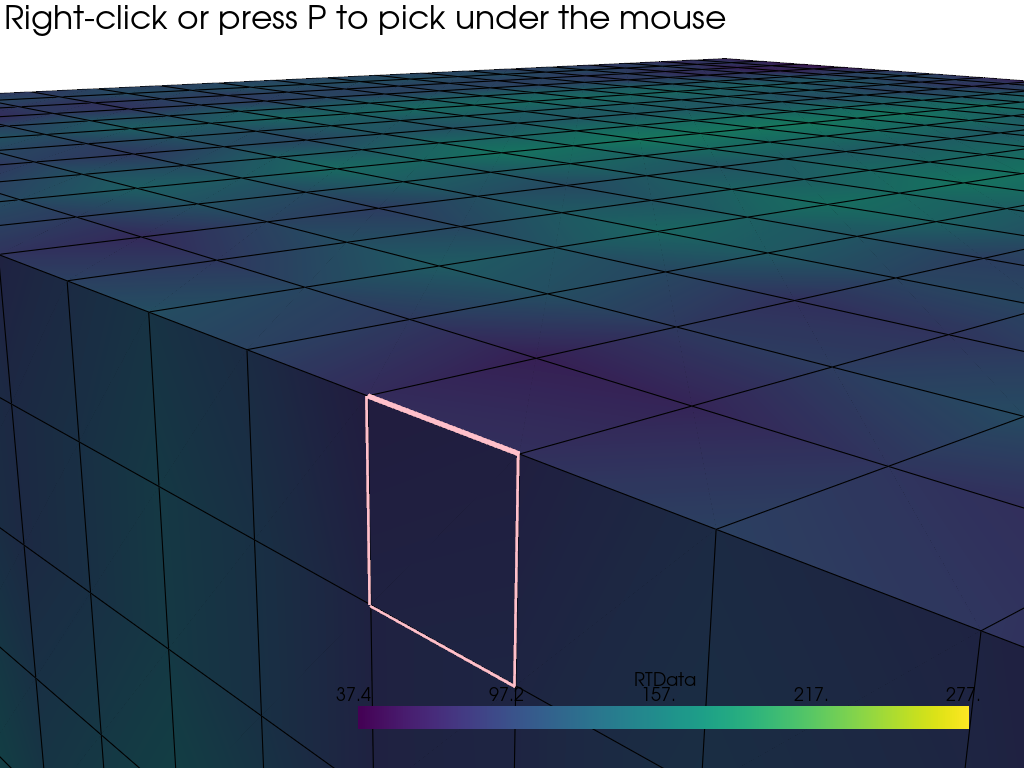
ボクセルセルの面をピックする#
mesh = pv.Wavelet()

pl = pv.Plotter()
pl.add_mesh(mesh, show_edges=True, pickable=True)
pl.enable_element_picking(mode=ElementType.FACE)

pl.camera_position = [
    (13.523728057554308, 9.910583926360937, 11.827103195167833),
    (2.229008884793069, -2.782397236304676, 6.84282248642347),
    (-0.17641568583704878, -0.21978122178947299, 0.9594653304520027),
]

pl.show(auto_close=False)

# Programmatically pick a face to make example look nice
try:
    width, height = pl.window_size
    pl.iren._mouse_right_button_press(419, 263)
    pl.iren._mouse_right_button_release()
except AttributeError:
    # ignore this section when manually closing the window
    pass
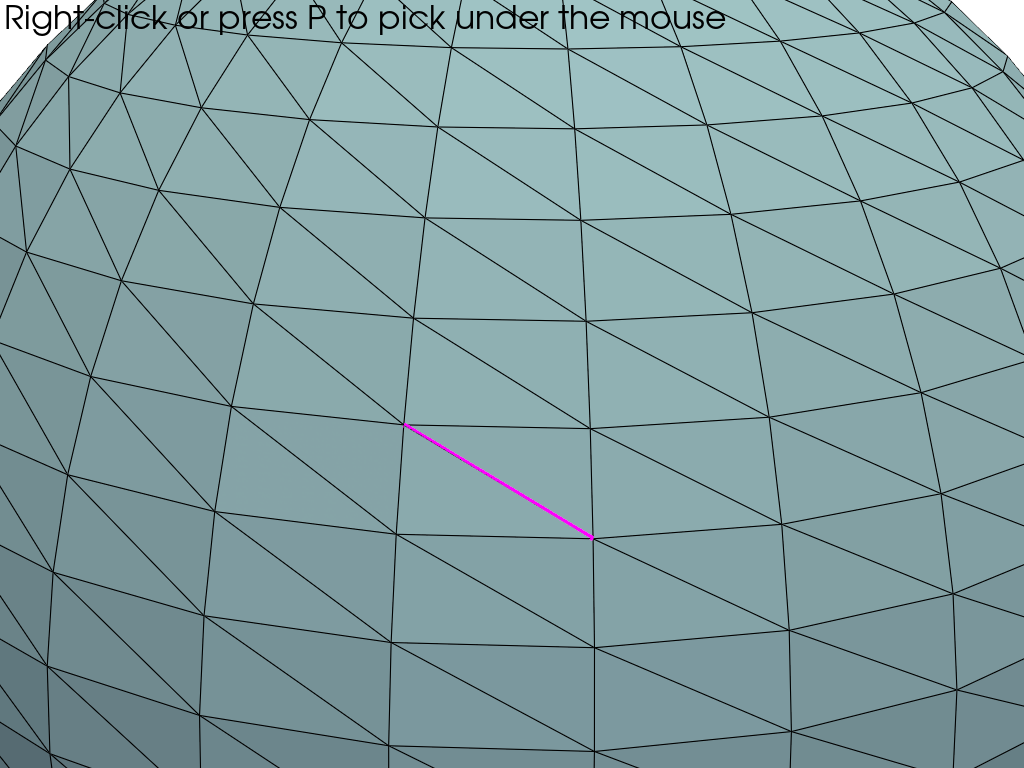
セルの端を選ぶ#
sphere = pv.Sphere()

pl = pv.Plotter()
pl.add_mesh(sphere, show_edges=True, pickable=True)
pl.enable_element_picking(mode=ElementType.EDGE)

pl.camera_position = [
    (0.7896646029990011, 0.7520805261169909, 0.5148524767495051),
    (-0.014748048334009667, -0.0257133671899262, 0.07194025085895145),
    (-0.26016740957025775, -0.2603941863919363, 0.9297891087180916),
]

pl.show(auto_close=False)

# Programmatically pick a face to make example look nice
try:
    width, height = pl.window_size
    pl.iren._mouse_right_button_press(480, 300)
    pl.iren._mouse_right_button_release()
except AttributeError:
    # ignore this section when manually closing the window
    pass
Total running time of the script: (0 minutes 1.161 seconds)