注釈
Go to the end をクリックすると完全なサンプルコードをダウンロードできます.
高速Fourier変換#
この例では, pyvista.ImageData.fft() フィルターを使用して, pyvista.ImageData に高速フーリエ変換(FFT)を適用する方法を示しています.
ここでは,画像のノイズ除去を行い, low pass filter を実行することで "高周波" コンテンツを効果的に除去することで,FFTの使用方法を説明します.
この例は, Image denoising by FFT に触発されたものです.
import numpy as np

import pyvista as pv
from pyvista import examples
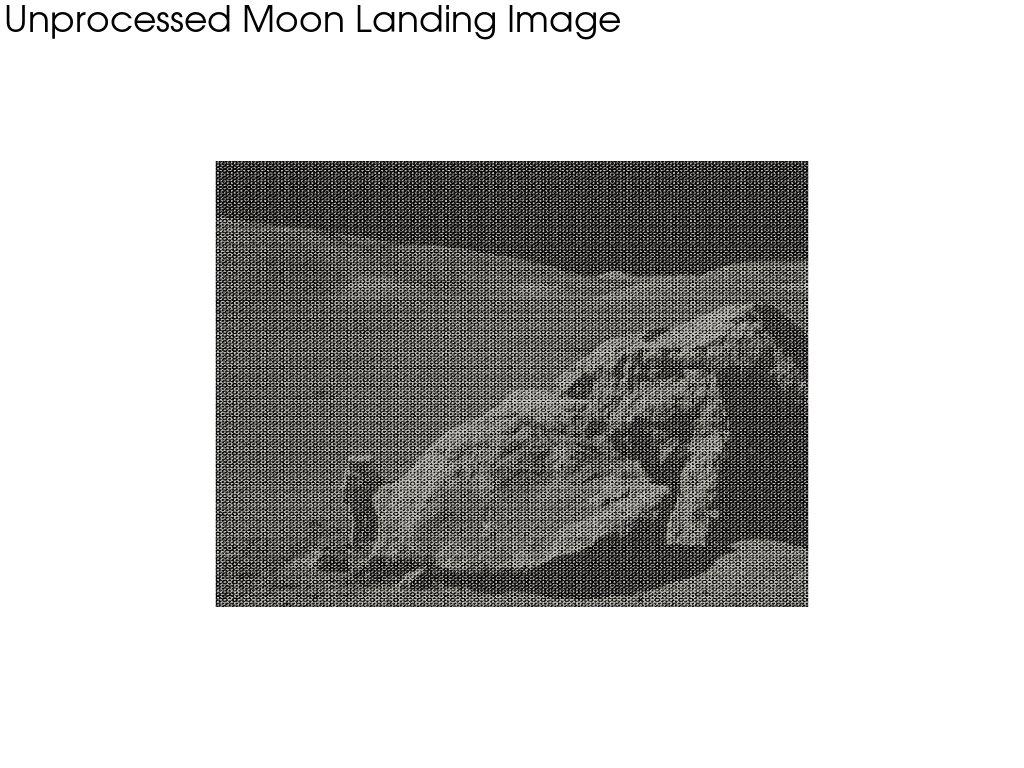
月面着陸のサンプル画像を読み込み,プロットします.
image = examples.download_moonlanding_image()
print(image.point_data)

# Create a theme that we can reuse when plotting the image
grey_theme = pv.themes.DocumentTheme()
grey_theme.cmap = 'gray'
grey_theme.show_scalar_bar = False
grey_theme.axes.show = False
image.plot(theme=grey_theme, cpos='xy', text='Unprocessed Moon Landing Image')
pyvista DataSetAttributes
Association     : POINT
Active Scalars  : PNGImage
Active Vectors  : None
Active Texture  : None
Active Normals  : None
Contains arrays :
    PNGImage                uint8      (298620,)            SCALARS
画像にFFTを適用する#
FFT は,アクティブなスカラー, 'PNGImage' ,PNG イメージを読み込む際のデフォルトのスカラー名に適用されます.
このフィルタからの出力は, output_scalars_name で指定しない限り,同じ名前で保存された複素配列になります.
fft_image = image.fft()
fft_image.point_data
pyvista DataSetAttributes
Association     : POINT
Active Scalars  : PNGImage
Active Vectors  : None
Active Texture  : None
Active Normals  : None
Contains arrays :
    PNGImage                complex128 (298620,)            SCALARS
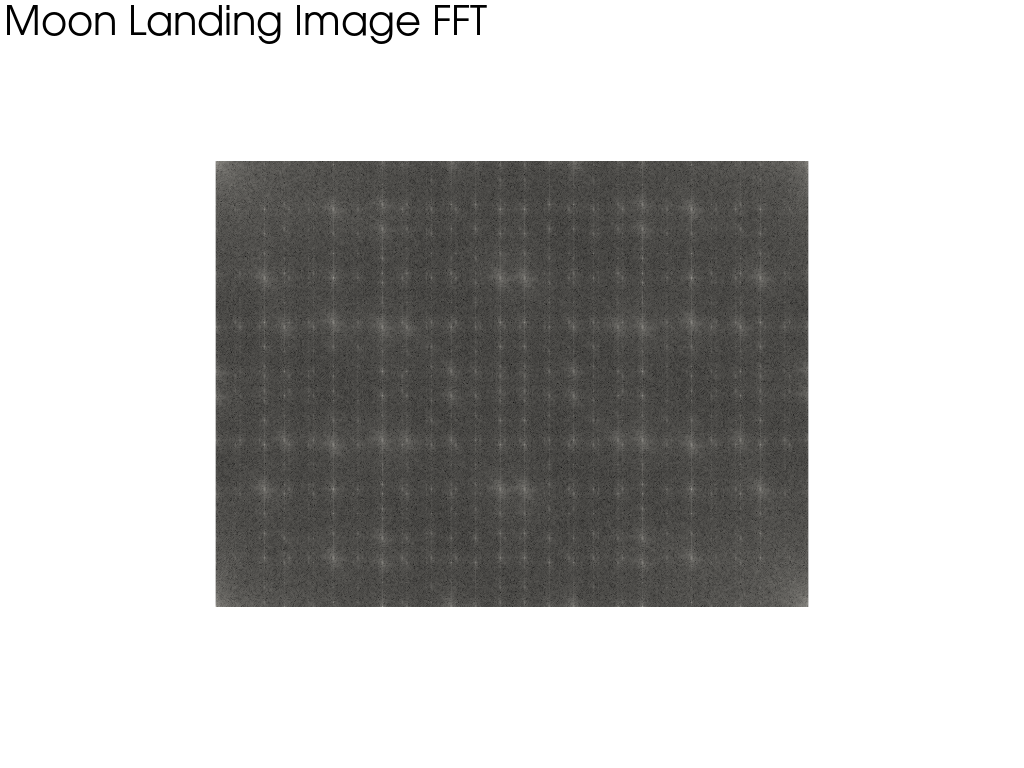
画像のFFTをプロットする#
画像のFFTの絶対値をプロットする.
この画像では,事実上データの "周波数" を見ていることに注意してください.4隅には画像の低周波コンテンツが,中央部には画像の高周波コンテンツが含まれています.
fft_image.plot(
    scalars=np.abs(fft_image.point_data['PNGImage']),
    cpos="xy",
    theme=grey_theme,
    log_scale=True,
    text='Moon Landing Image FFT',
    copy_mesh=True,  # don't overwrite scalars when plotting
)
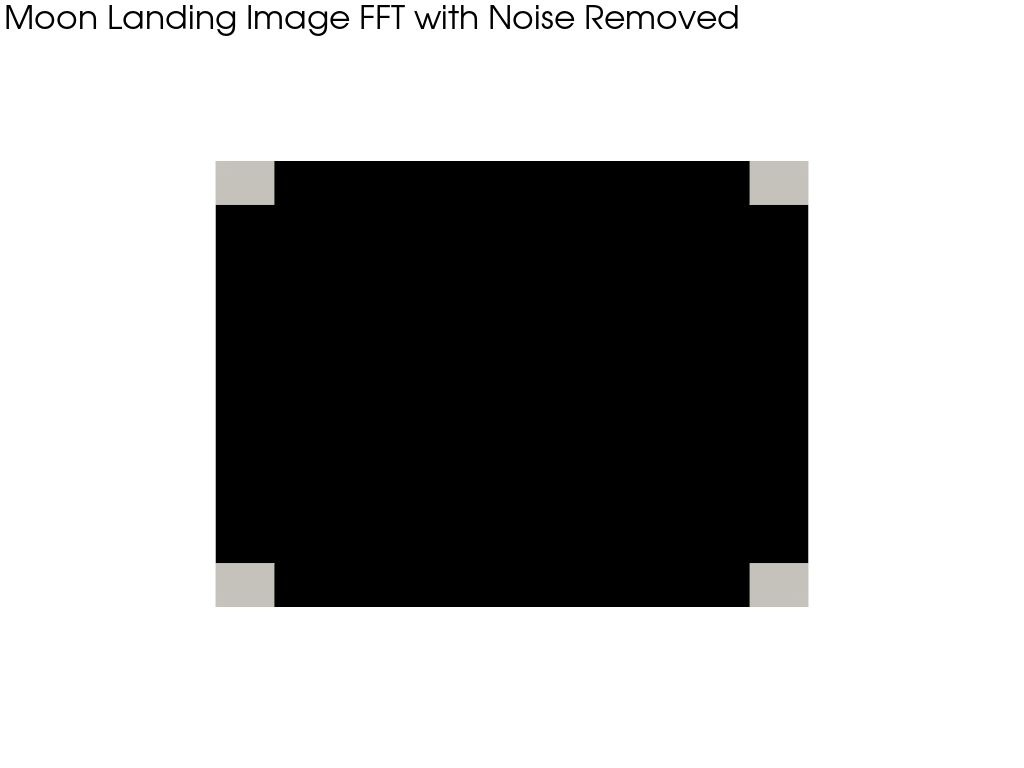
fft_image からノイズを除去#
実質的には,画像から高周波(ノイズの多い)データを除去したいのです.まず,画像の大きさを整形してみましょう.
次に,画像の中間の80%の内容を除去するローパスフィルタを実行します.高周波のコンテンツが配列の真ん中にあることに注意してください.
注釈
既存の pyvista.ImageDataFilters.low_pass() フィルタを使用する方が簡単で効率的です.このセクションは,デモンストレーションのためにあります.
ratio_to_keep = 0.10

# modify the fft_image data
width, height, _ = fft_image.dimensions
data = fft_image['PNGImage'].reshape(height, width)  # note: axes flipped
data[int(height * ratio_to_keep) : -int(height * ratio_to_keep)] = 0
data[:, int(width * ratio_to_keep) : -int(width * ratio_to_keep)] = 0

fft_image.plot(
    scalars=np.abs(data),
    cpos="xy",
    theme=grey_theme,
    log_scale=True,
    text='Moon Landing Image FFT with Noise Removed',
    copy_mesh=True,  # don't overwrite scalars when plotting
)
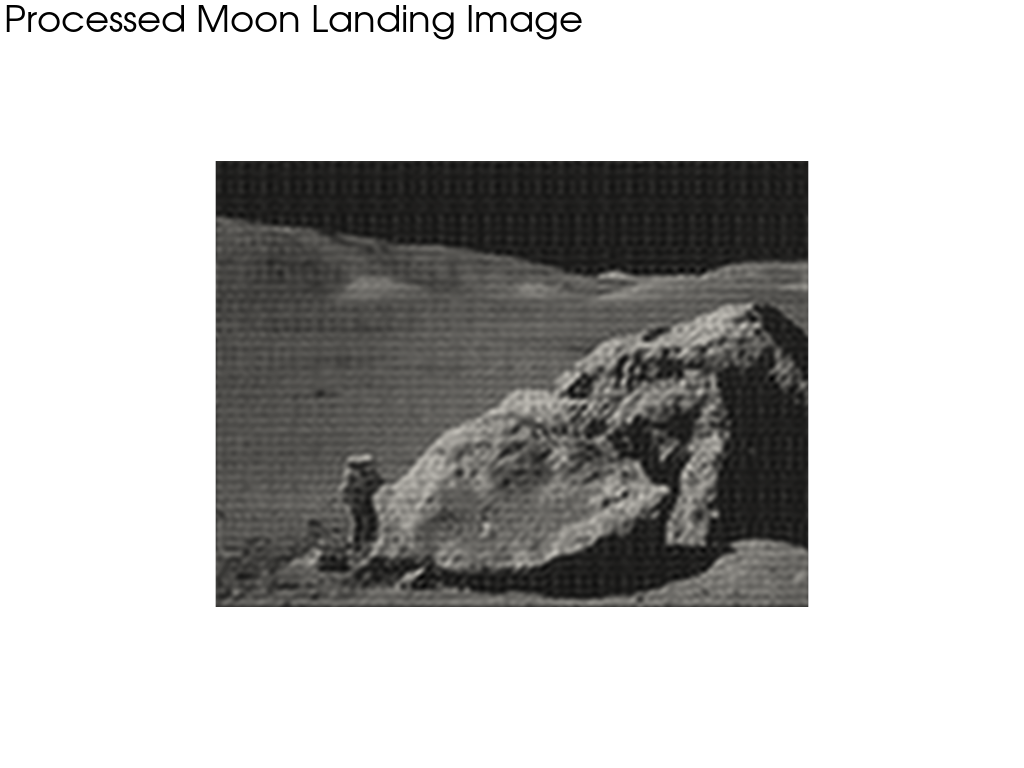
逆FFTによる空間領域への変換#
最後に,画像データを "空間" 領域に戻し,プロットします.
rfft = fft_image.rfft()
rfft['PNGImage'] = np.real(rfft['PNGImage'])
rfft.plot(cpos="xy", theme=grey_theme, text='Processed Moon Landing Image')
Total running time of the script: (0 minutes 12.765 seconds)